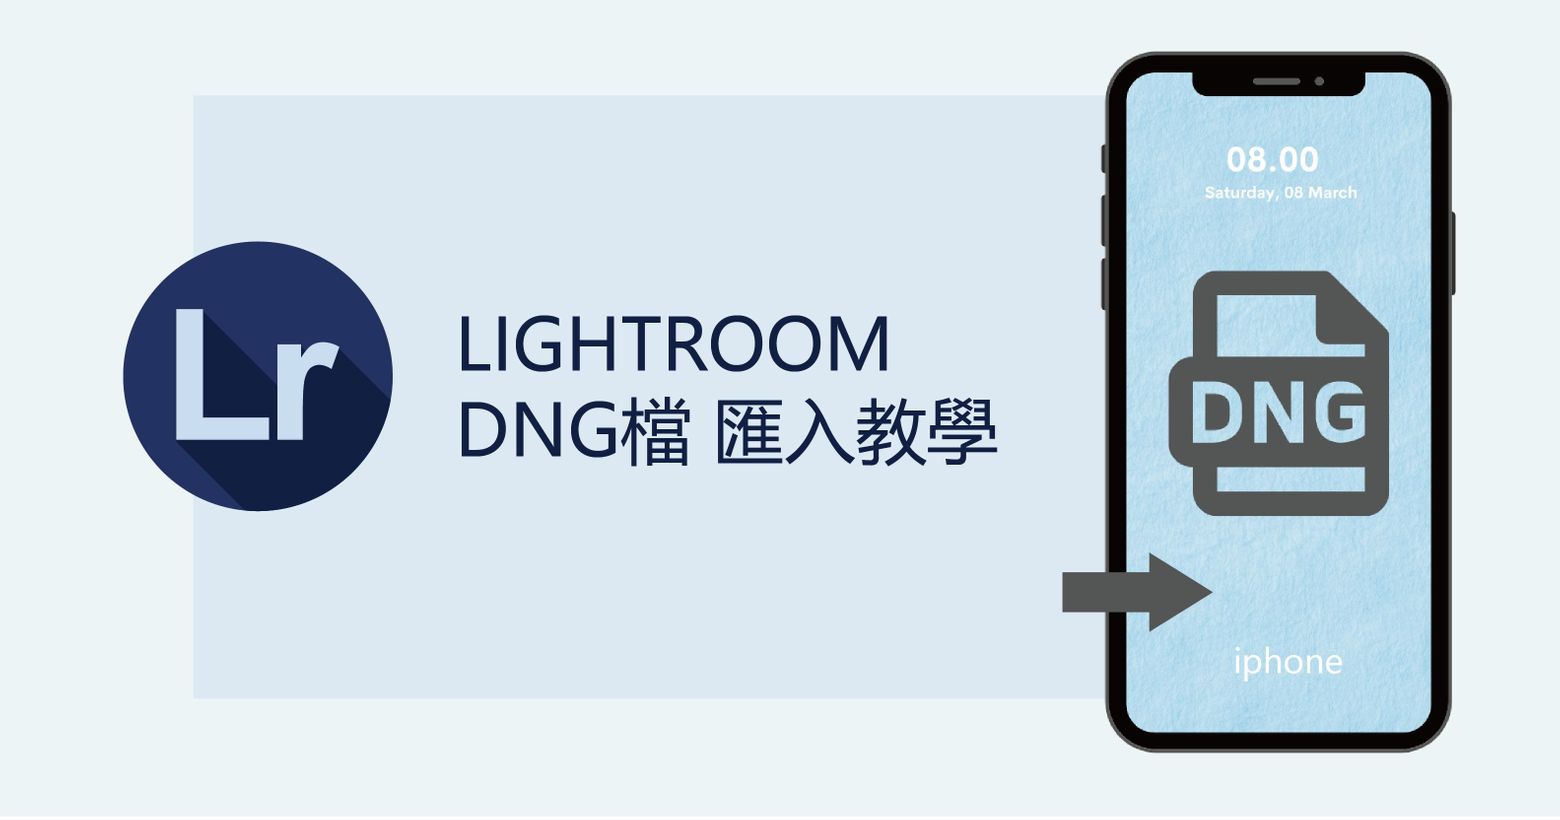
IG網美色調|手機版Lightroom如何匯入色調DNG檔

1 / 1
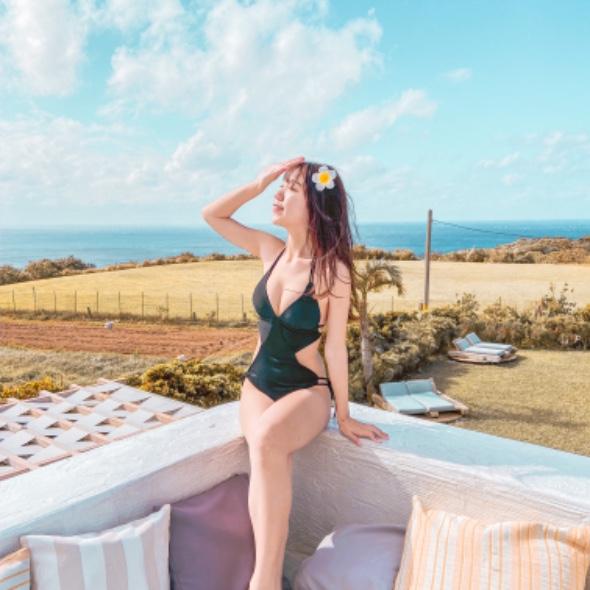
常常在IG上看到許多網美分享色調活動
通常會收到雲端連結,卻不知道怎麼將色調DNG檔匯入Lightroom嗎?
這篇手把手超詳細簡單教學,一步一步帶你操作
Lightroom DNG色調檔一鍵套用就是這麼簡單!
讓你輕鬆擁有質感美照!
* 以IPHONE做示範教學
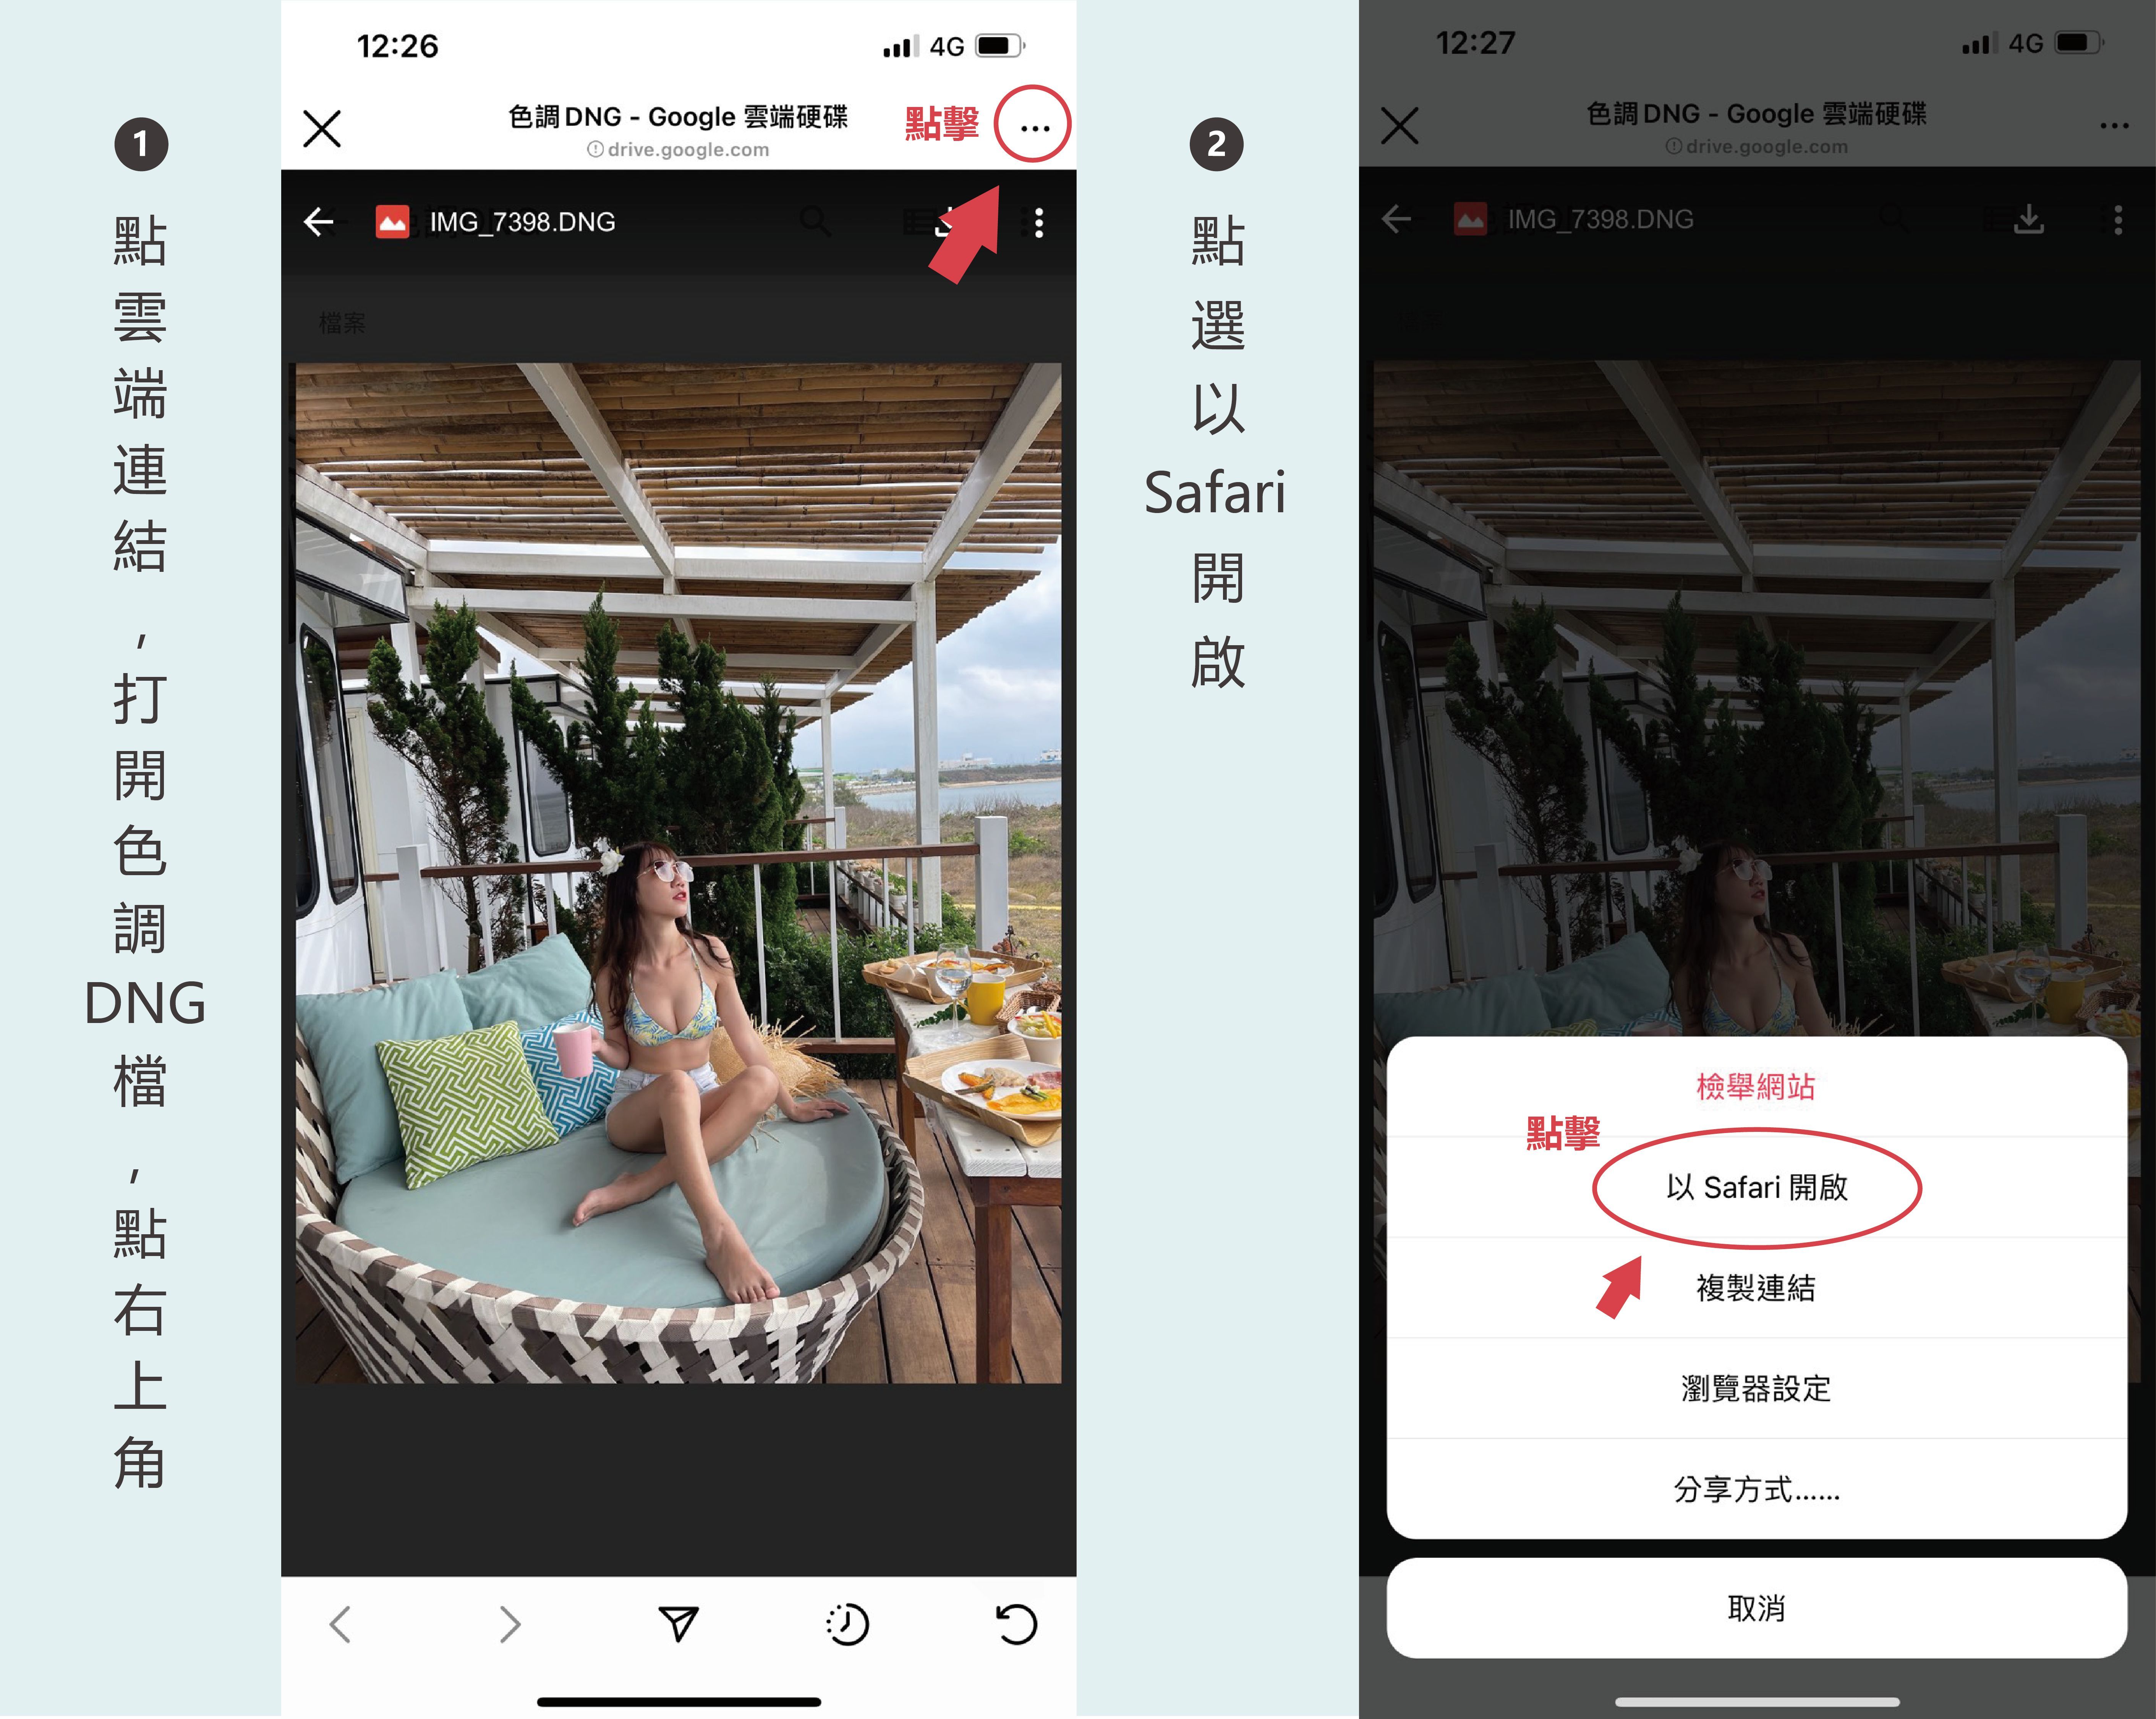
STEP1.
點開雲端連結,打開色調dng檔後
按照圖示點選畫面右上角的三個點「…」
如果是使用iphone,請選擇「使用Safari瀏覽」
使用android系統的話,可以選擇直接下載的按鍵。
我是廣告,請往下繼續閱讀
*因為DNG檔案一般手機無法辨識
所以下載後,從相片圖庫裡看到一片空白是正常的!!
等你用手機開啟Lightroom
並讀入這個DNG檔案之後
就會恢復正常了。

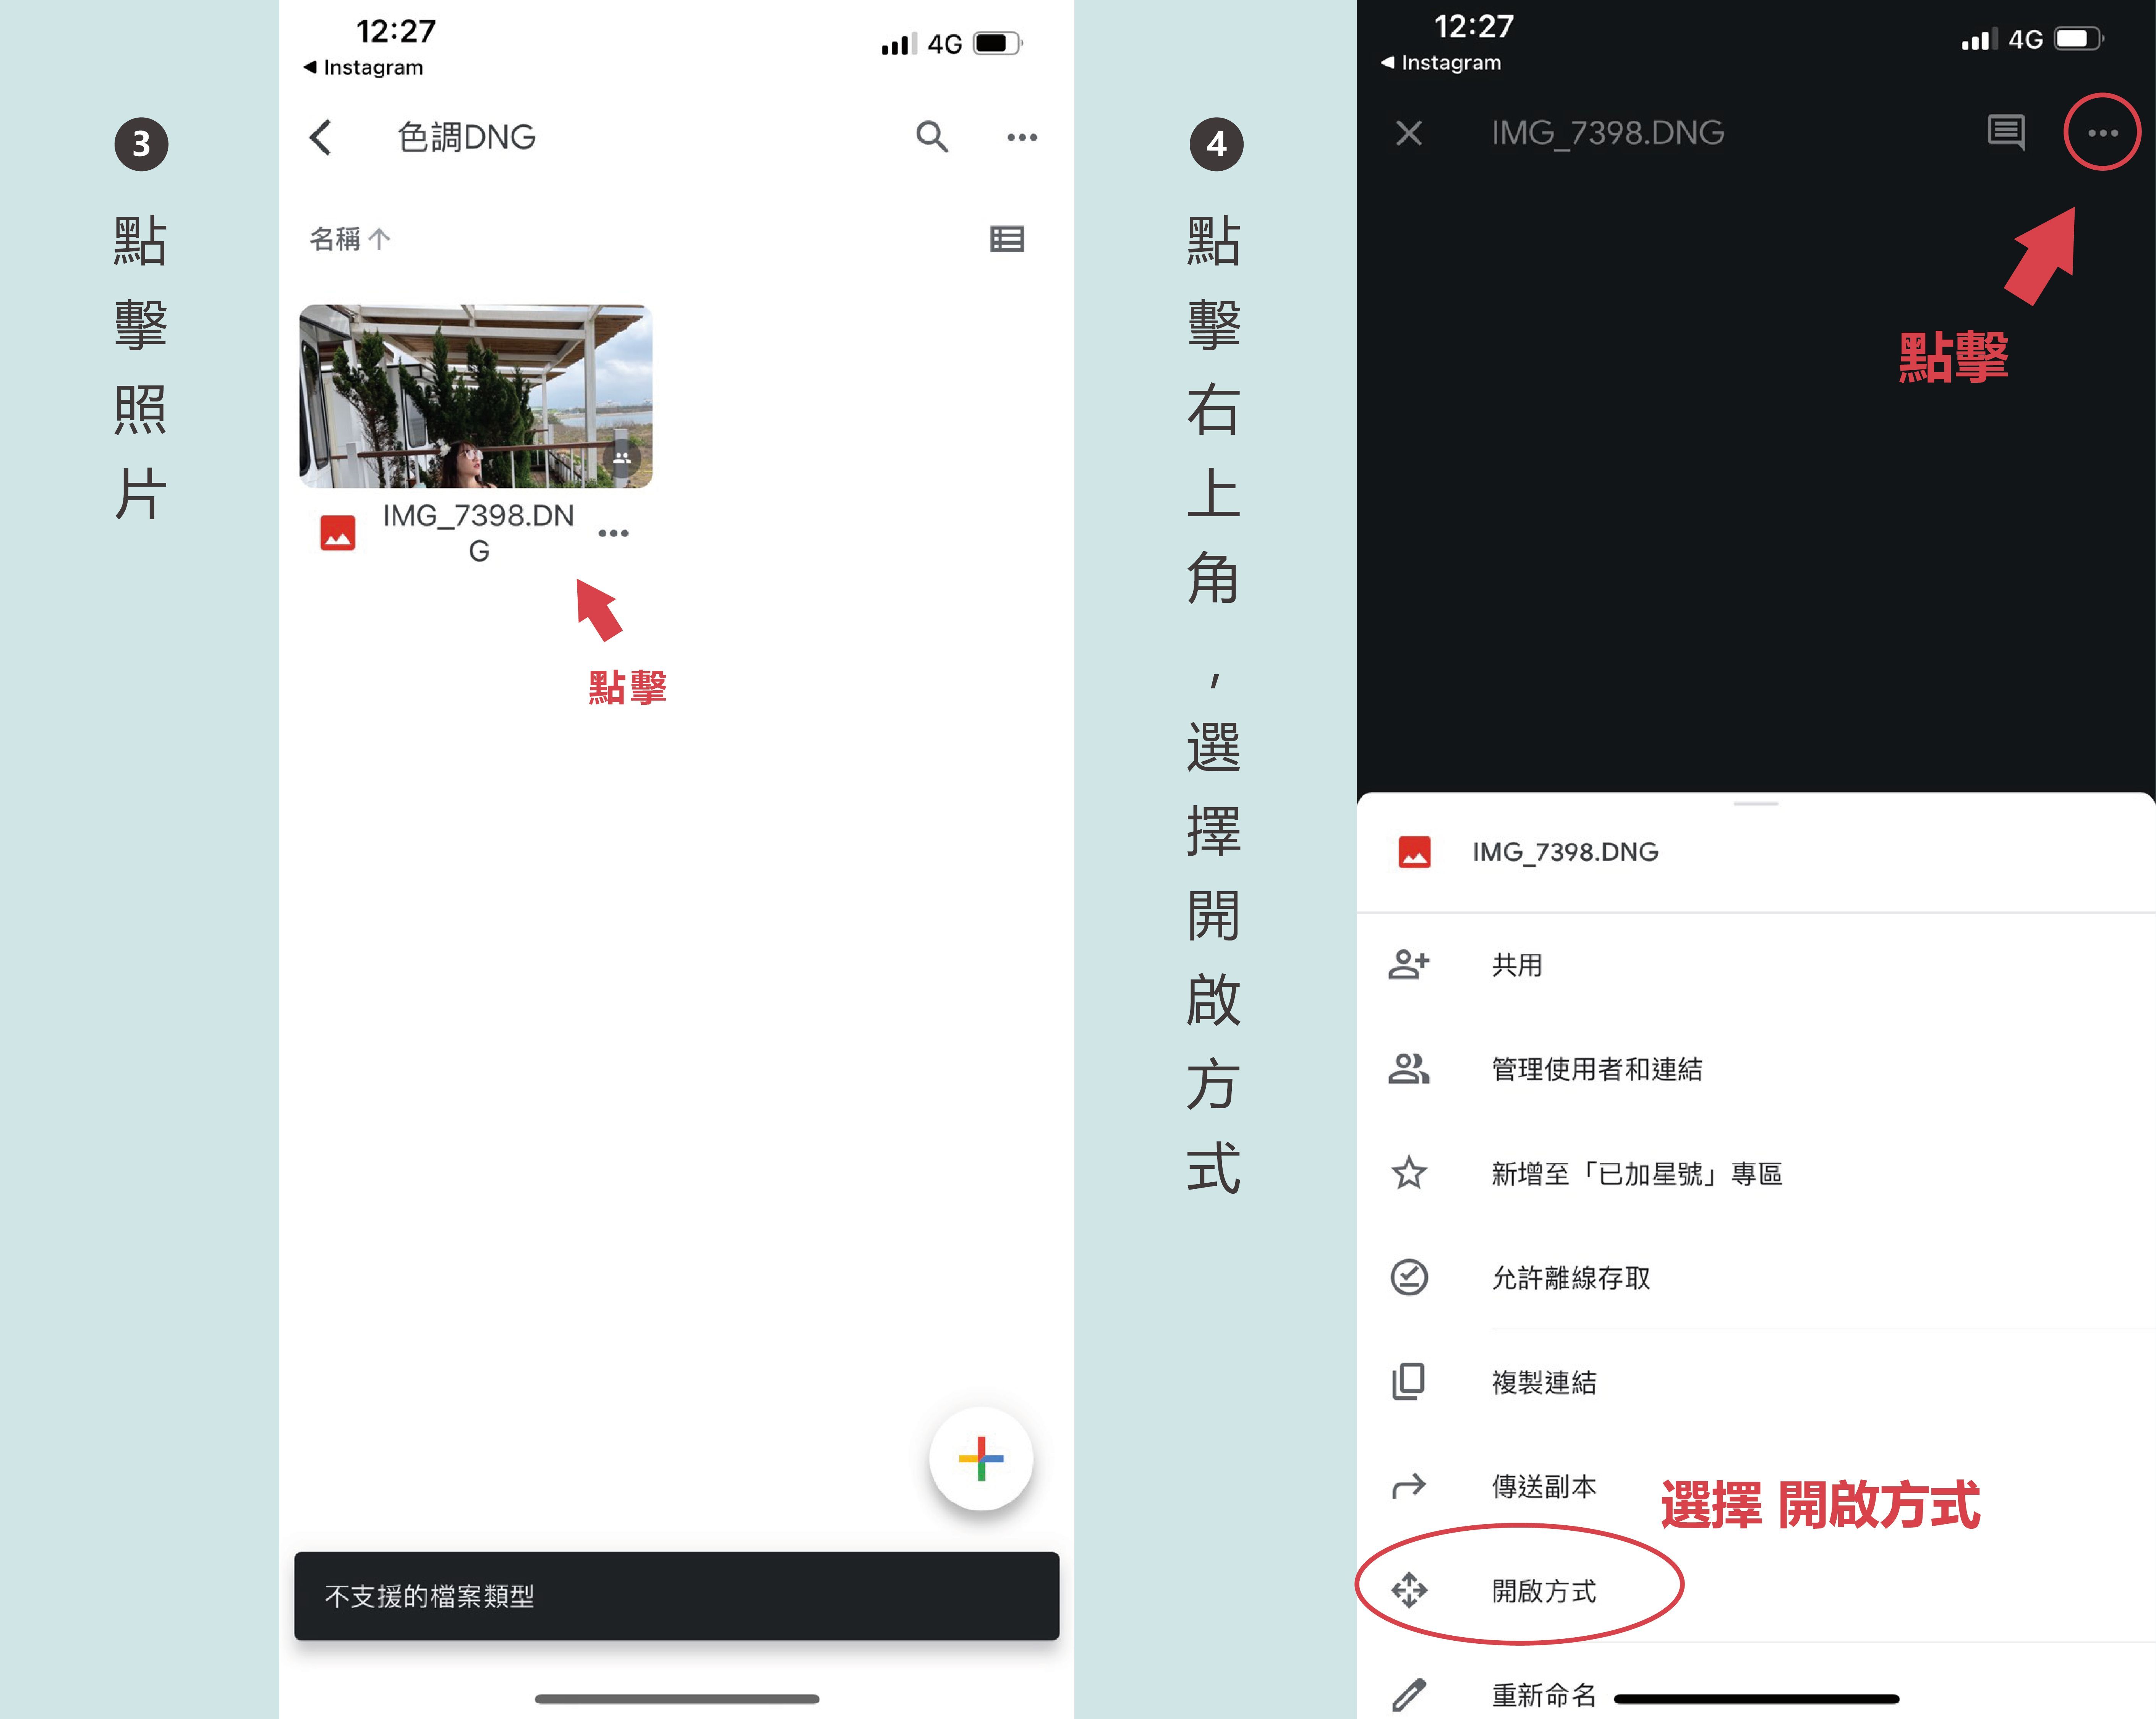
STEP2.
使用Safari開啟後,再點選照片
一樣點擊右上角3個點
接著選擇「開啟方式」這個選項。

STEP3.
之後就是耐心等待檔案匯出囉
下載完後選擇以Lightroom 開啟
我是廣告,請往下繼續閱讀

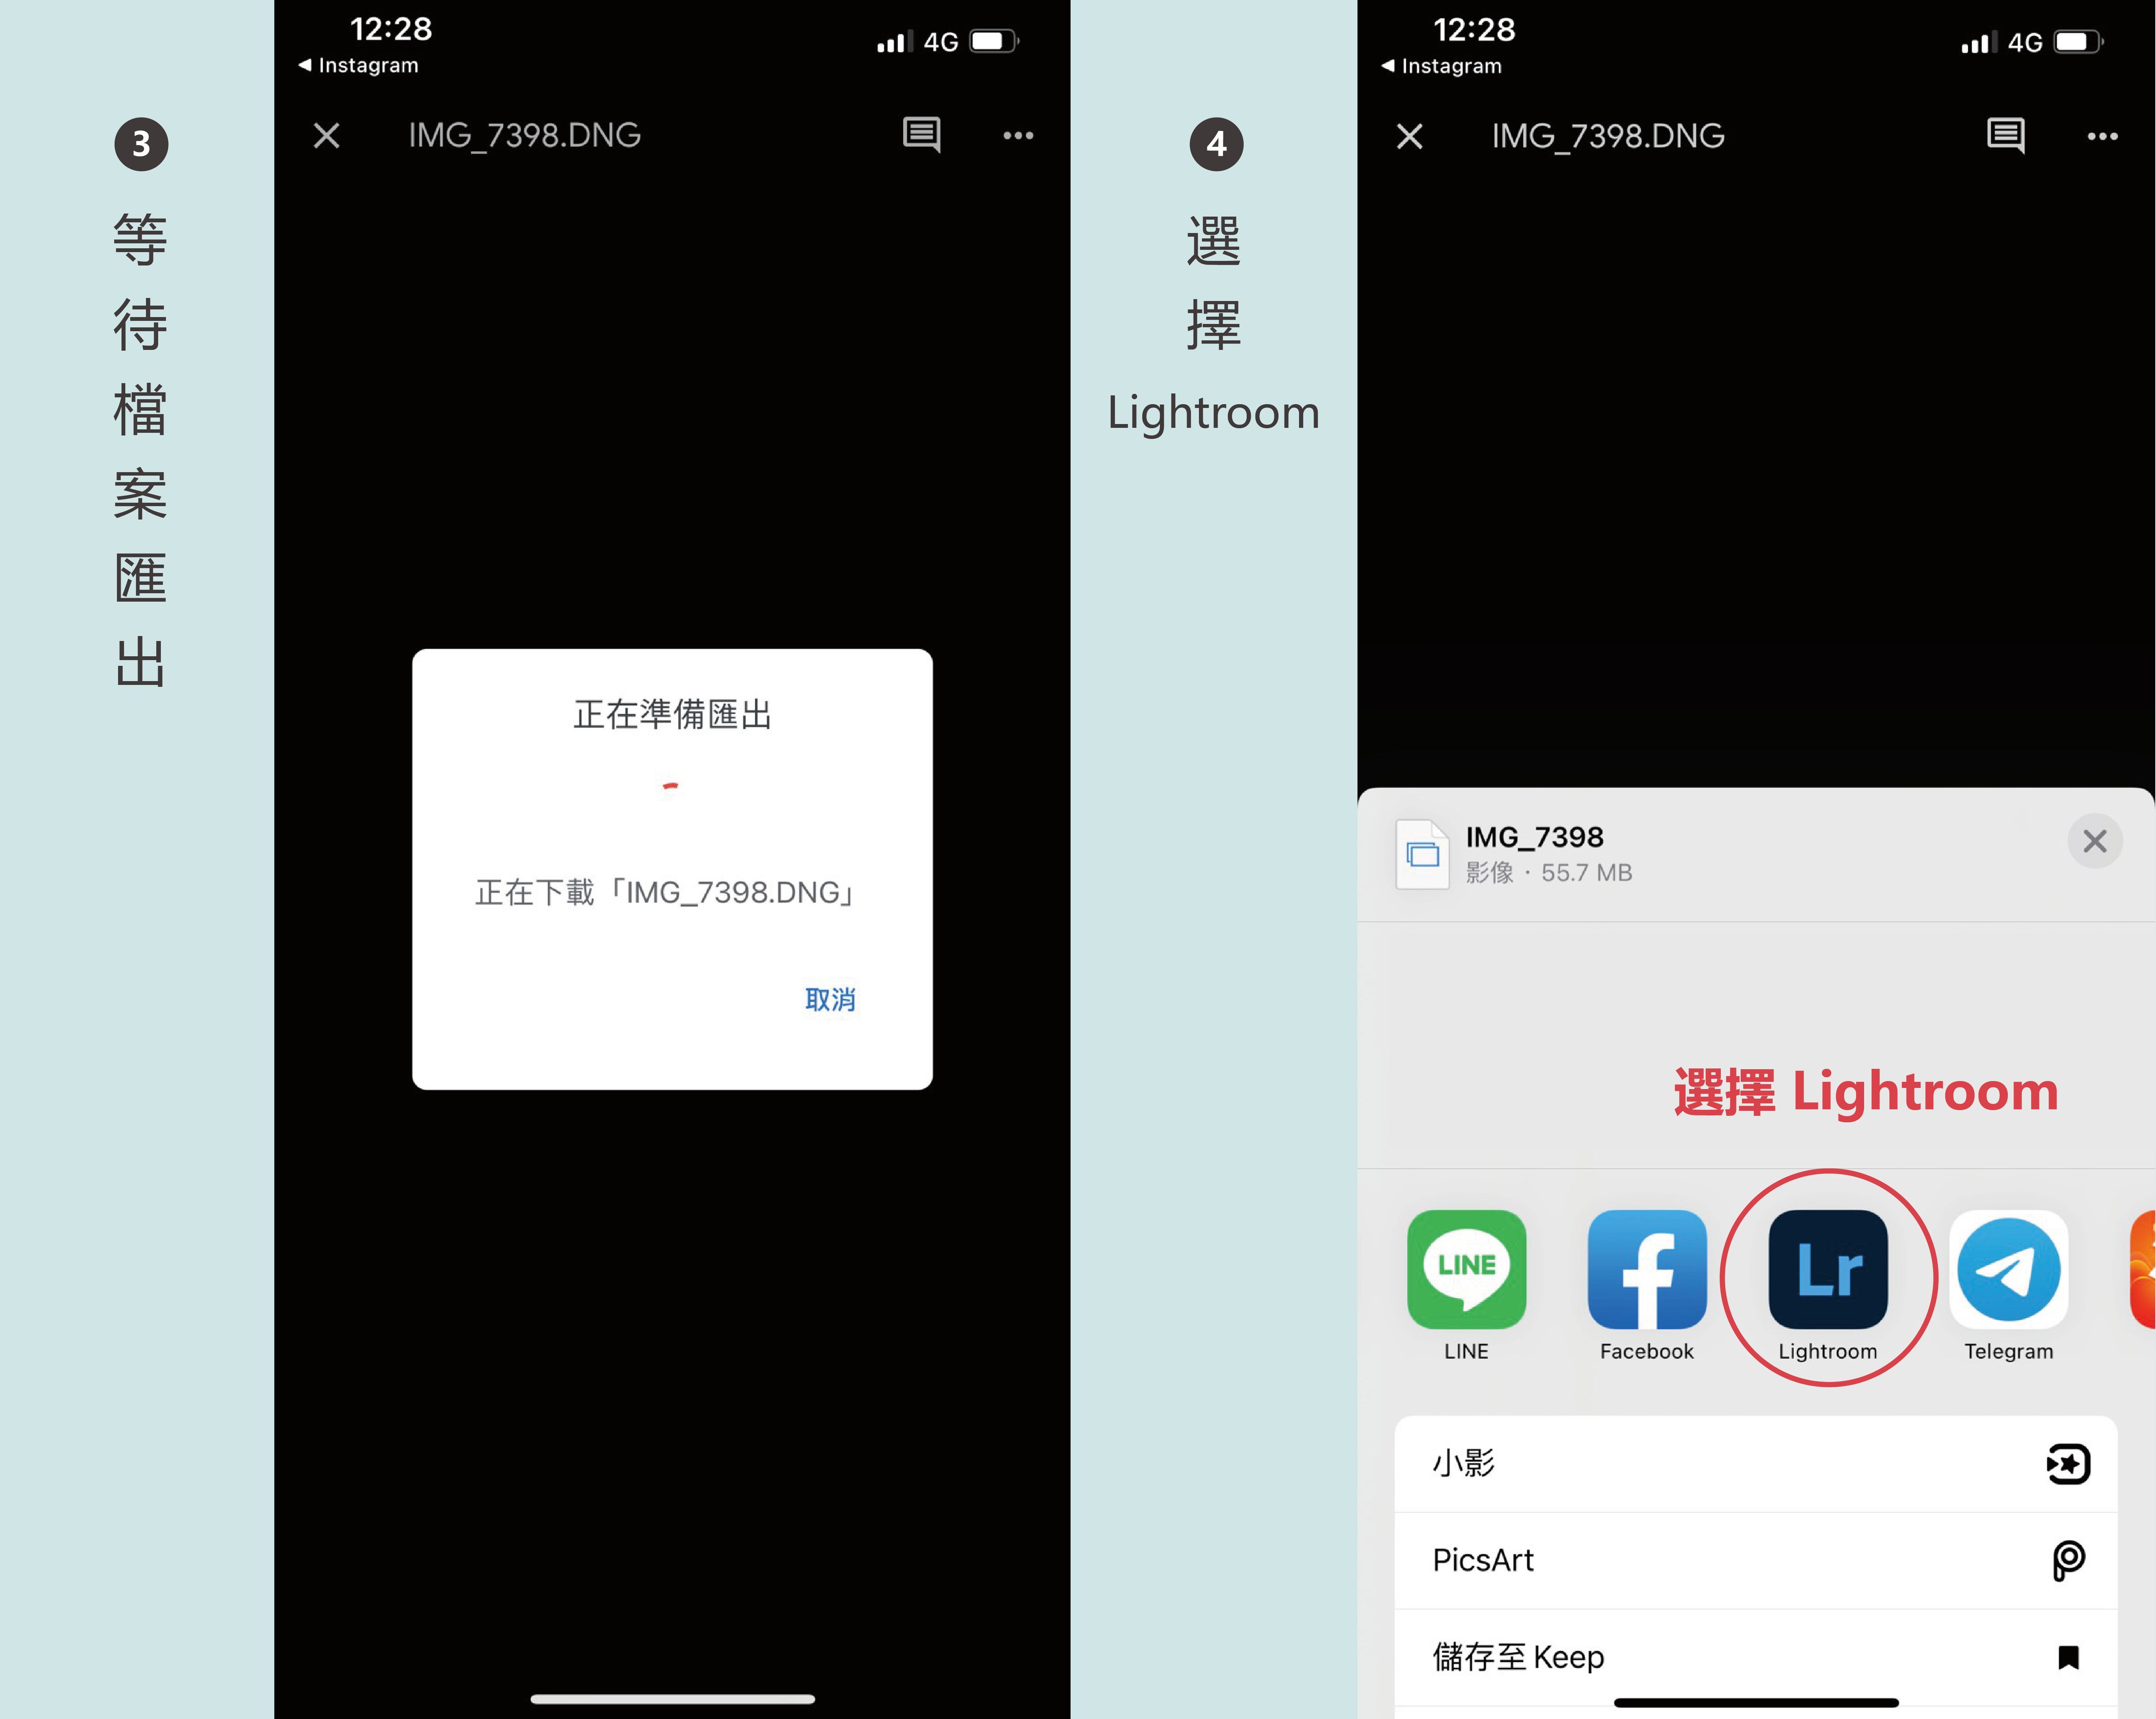
STEP4.
之後會跳出兩個選項
點擊立即啟動,照片就會出現在Lightroom裡囉!
DNG圖片匯入後點選右上角-三個點

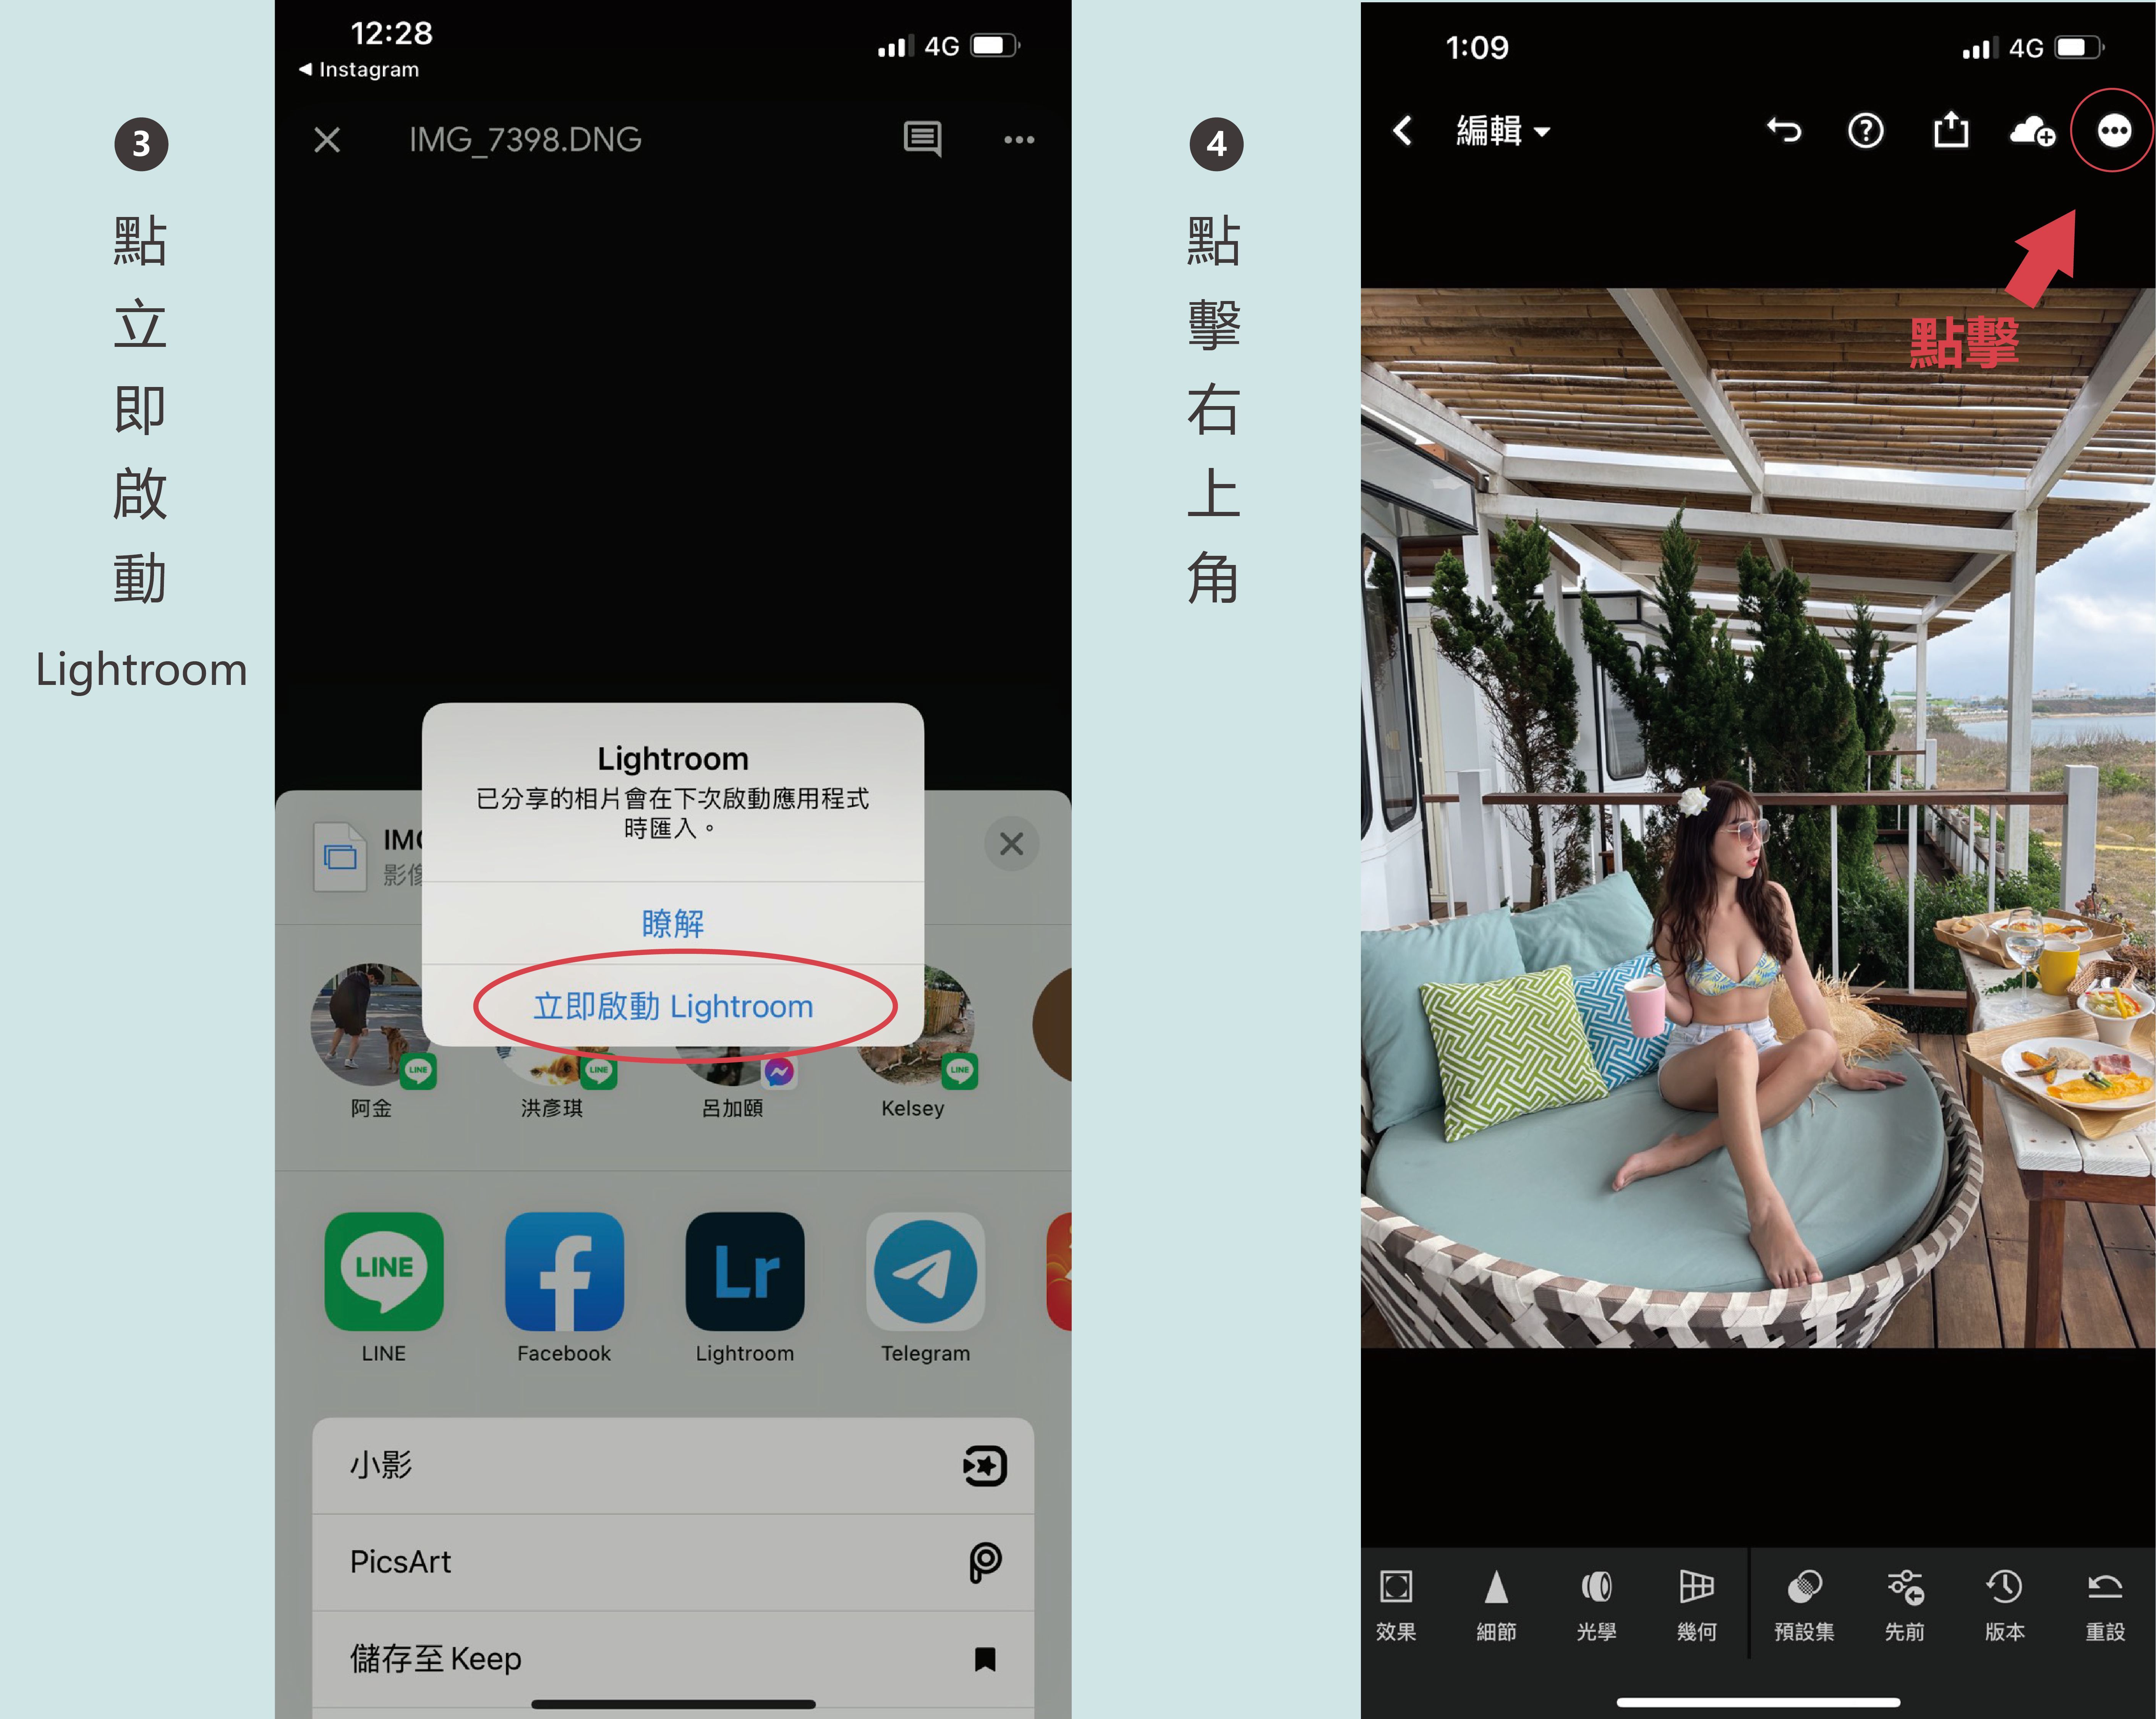
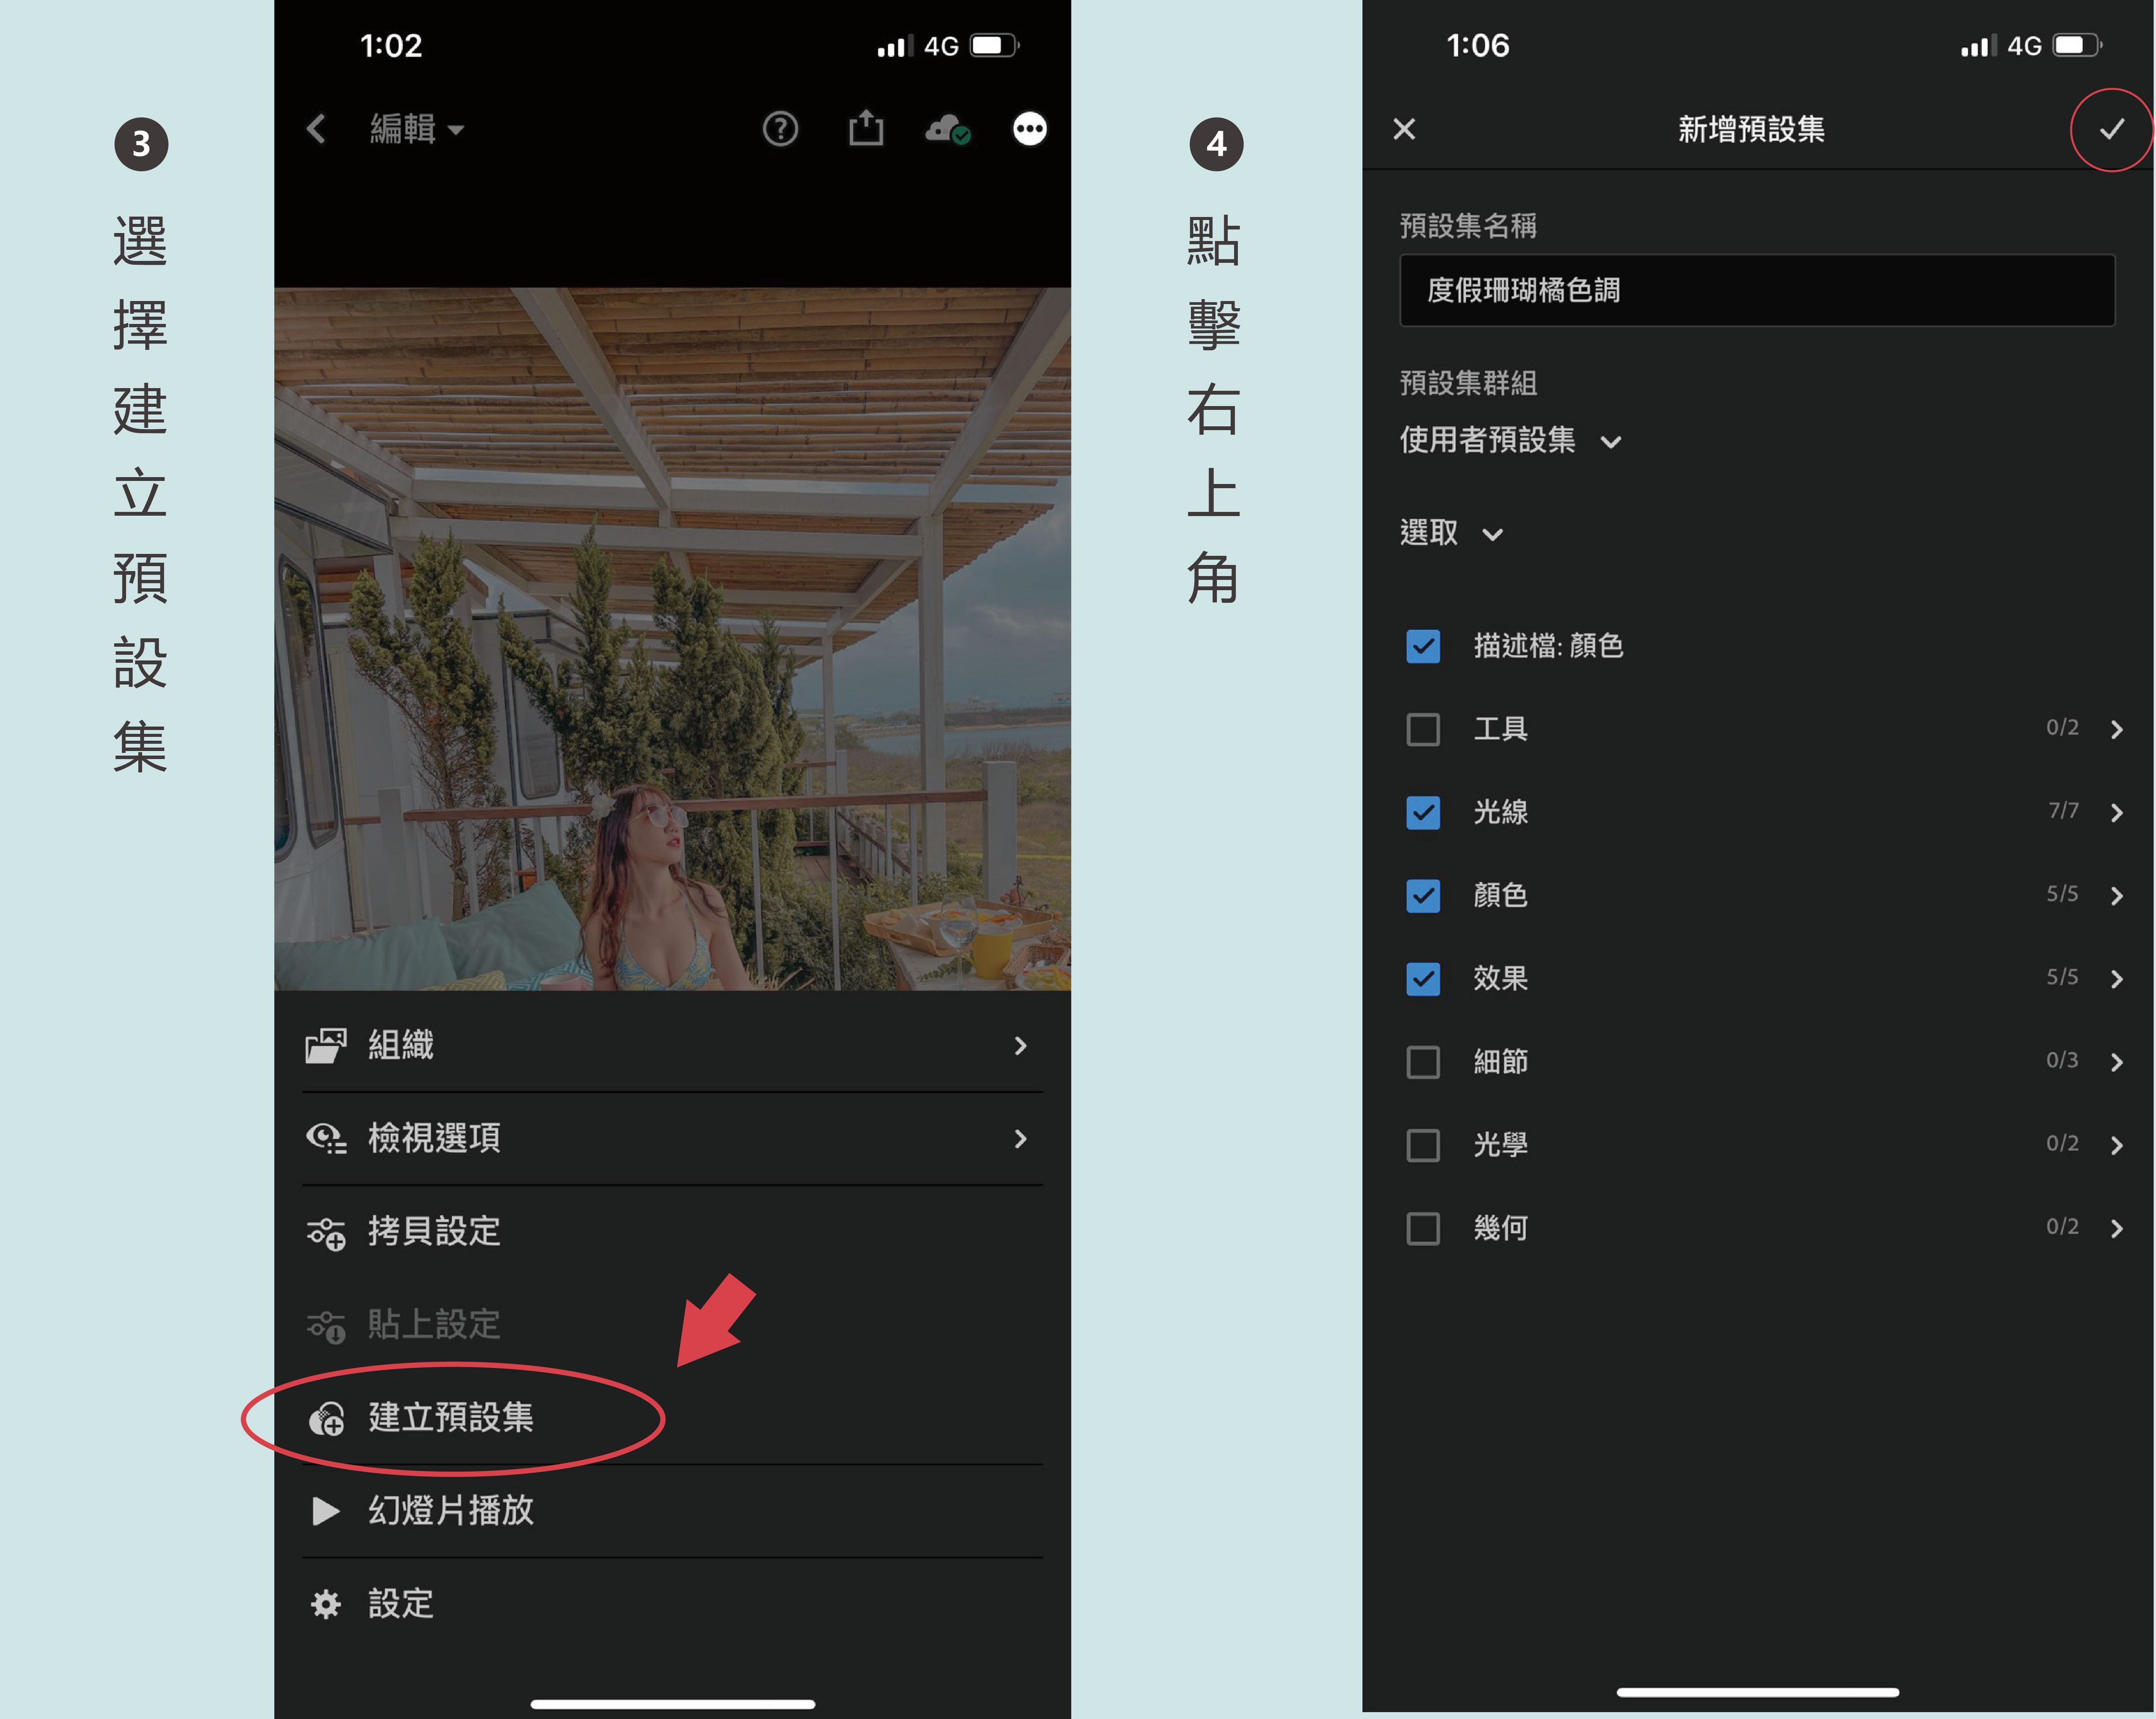
STEP5.
點選建立預設集
然後為檔案命名~
打勾的部分就是所有會拷貝到的數據
我是廣告,請往下繼續閱讀

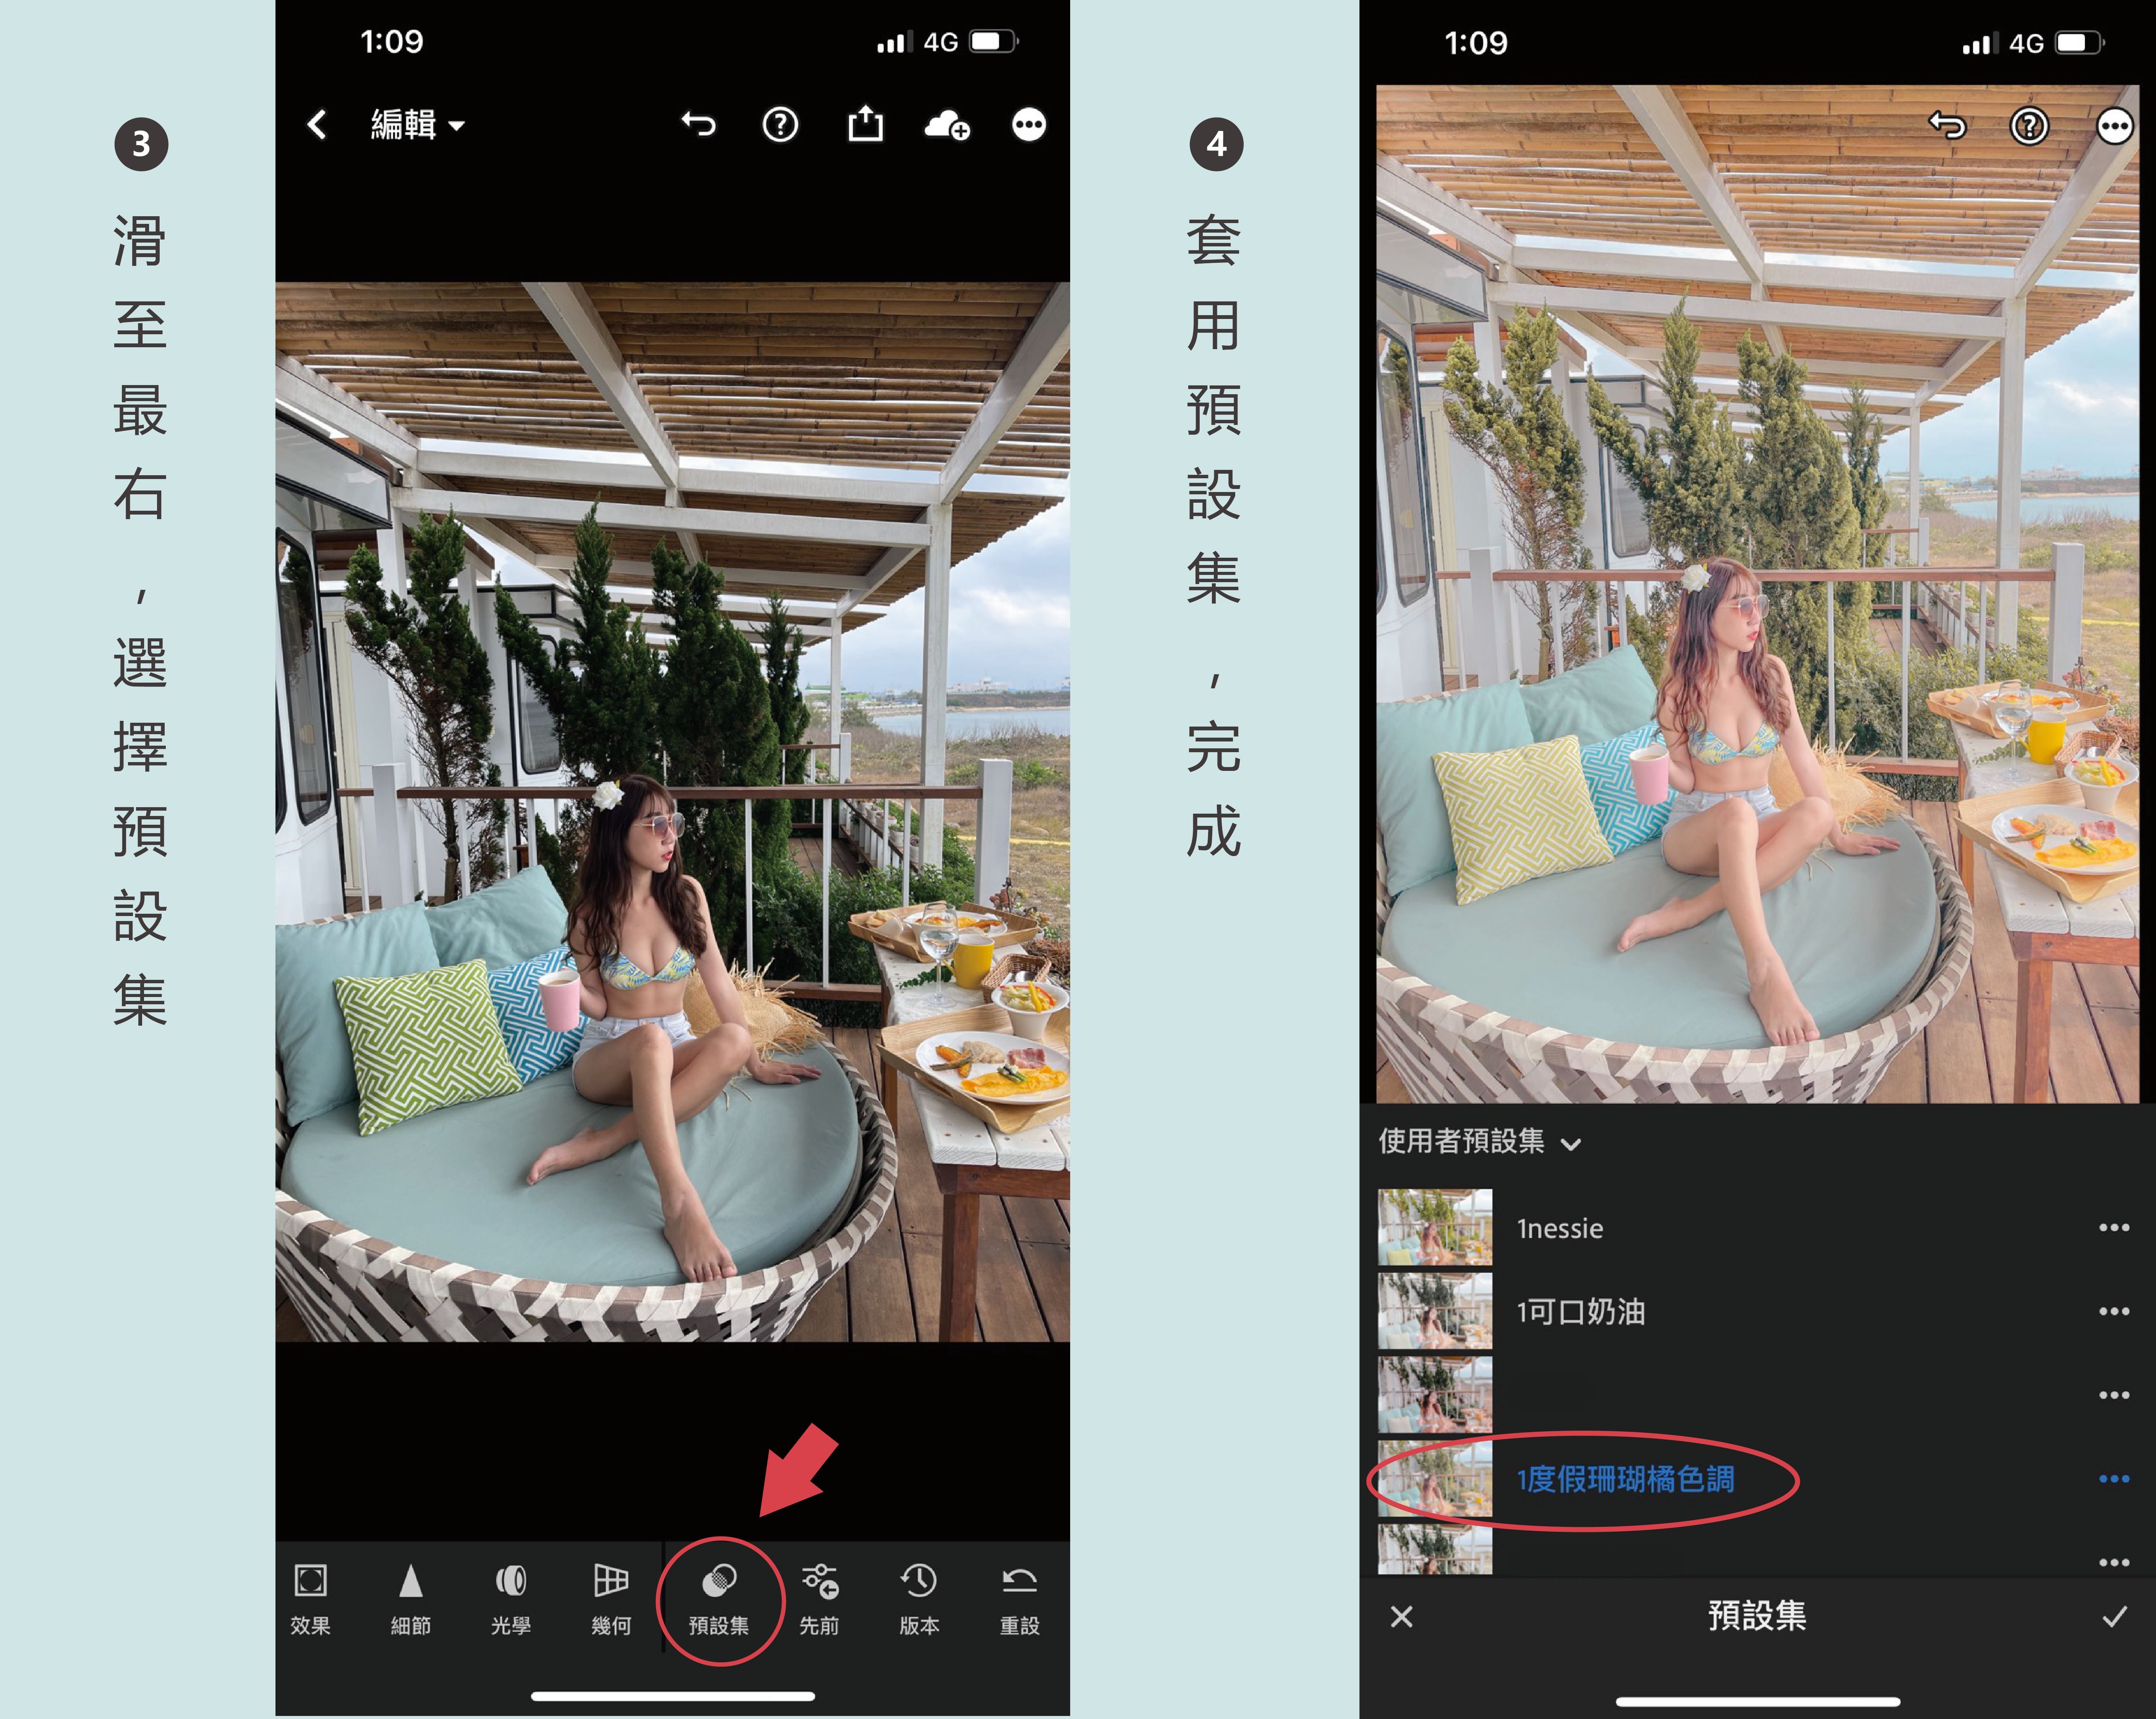
STEP6.
之後在下方工具列滑到最右邊
選擇預設集,就可以直接套用自己儲存的色調啦~~
就是這麼簡單輕鬆!!
趕快來試試❤
-
看更多IG修圖技巧
追蹤IG:chi_chi__77
我是廣告,請往下繼續閱讀
熱門文章第一名